SelectivePC
-
Posts
79 -
Joined
-
Last visited
-
Days Won
2
Content Type
Profiles
Forums
Gallery
Events
Store
Articles
Media Demo
Everything posted by SelectivePC
-

Barra build in the U.S.
SelectivePC replied to SelectivePC's topic in Conversions, transplants and Frankensteins
It is its currently, running and driving now. Just need to figure out how to post a video, or post it through YouTube I suppose. -
Barra build in the U.S.
SelectivePC replied to SelectivePC's topic in Conversions, transplants and Frankensteins
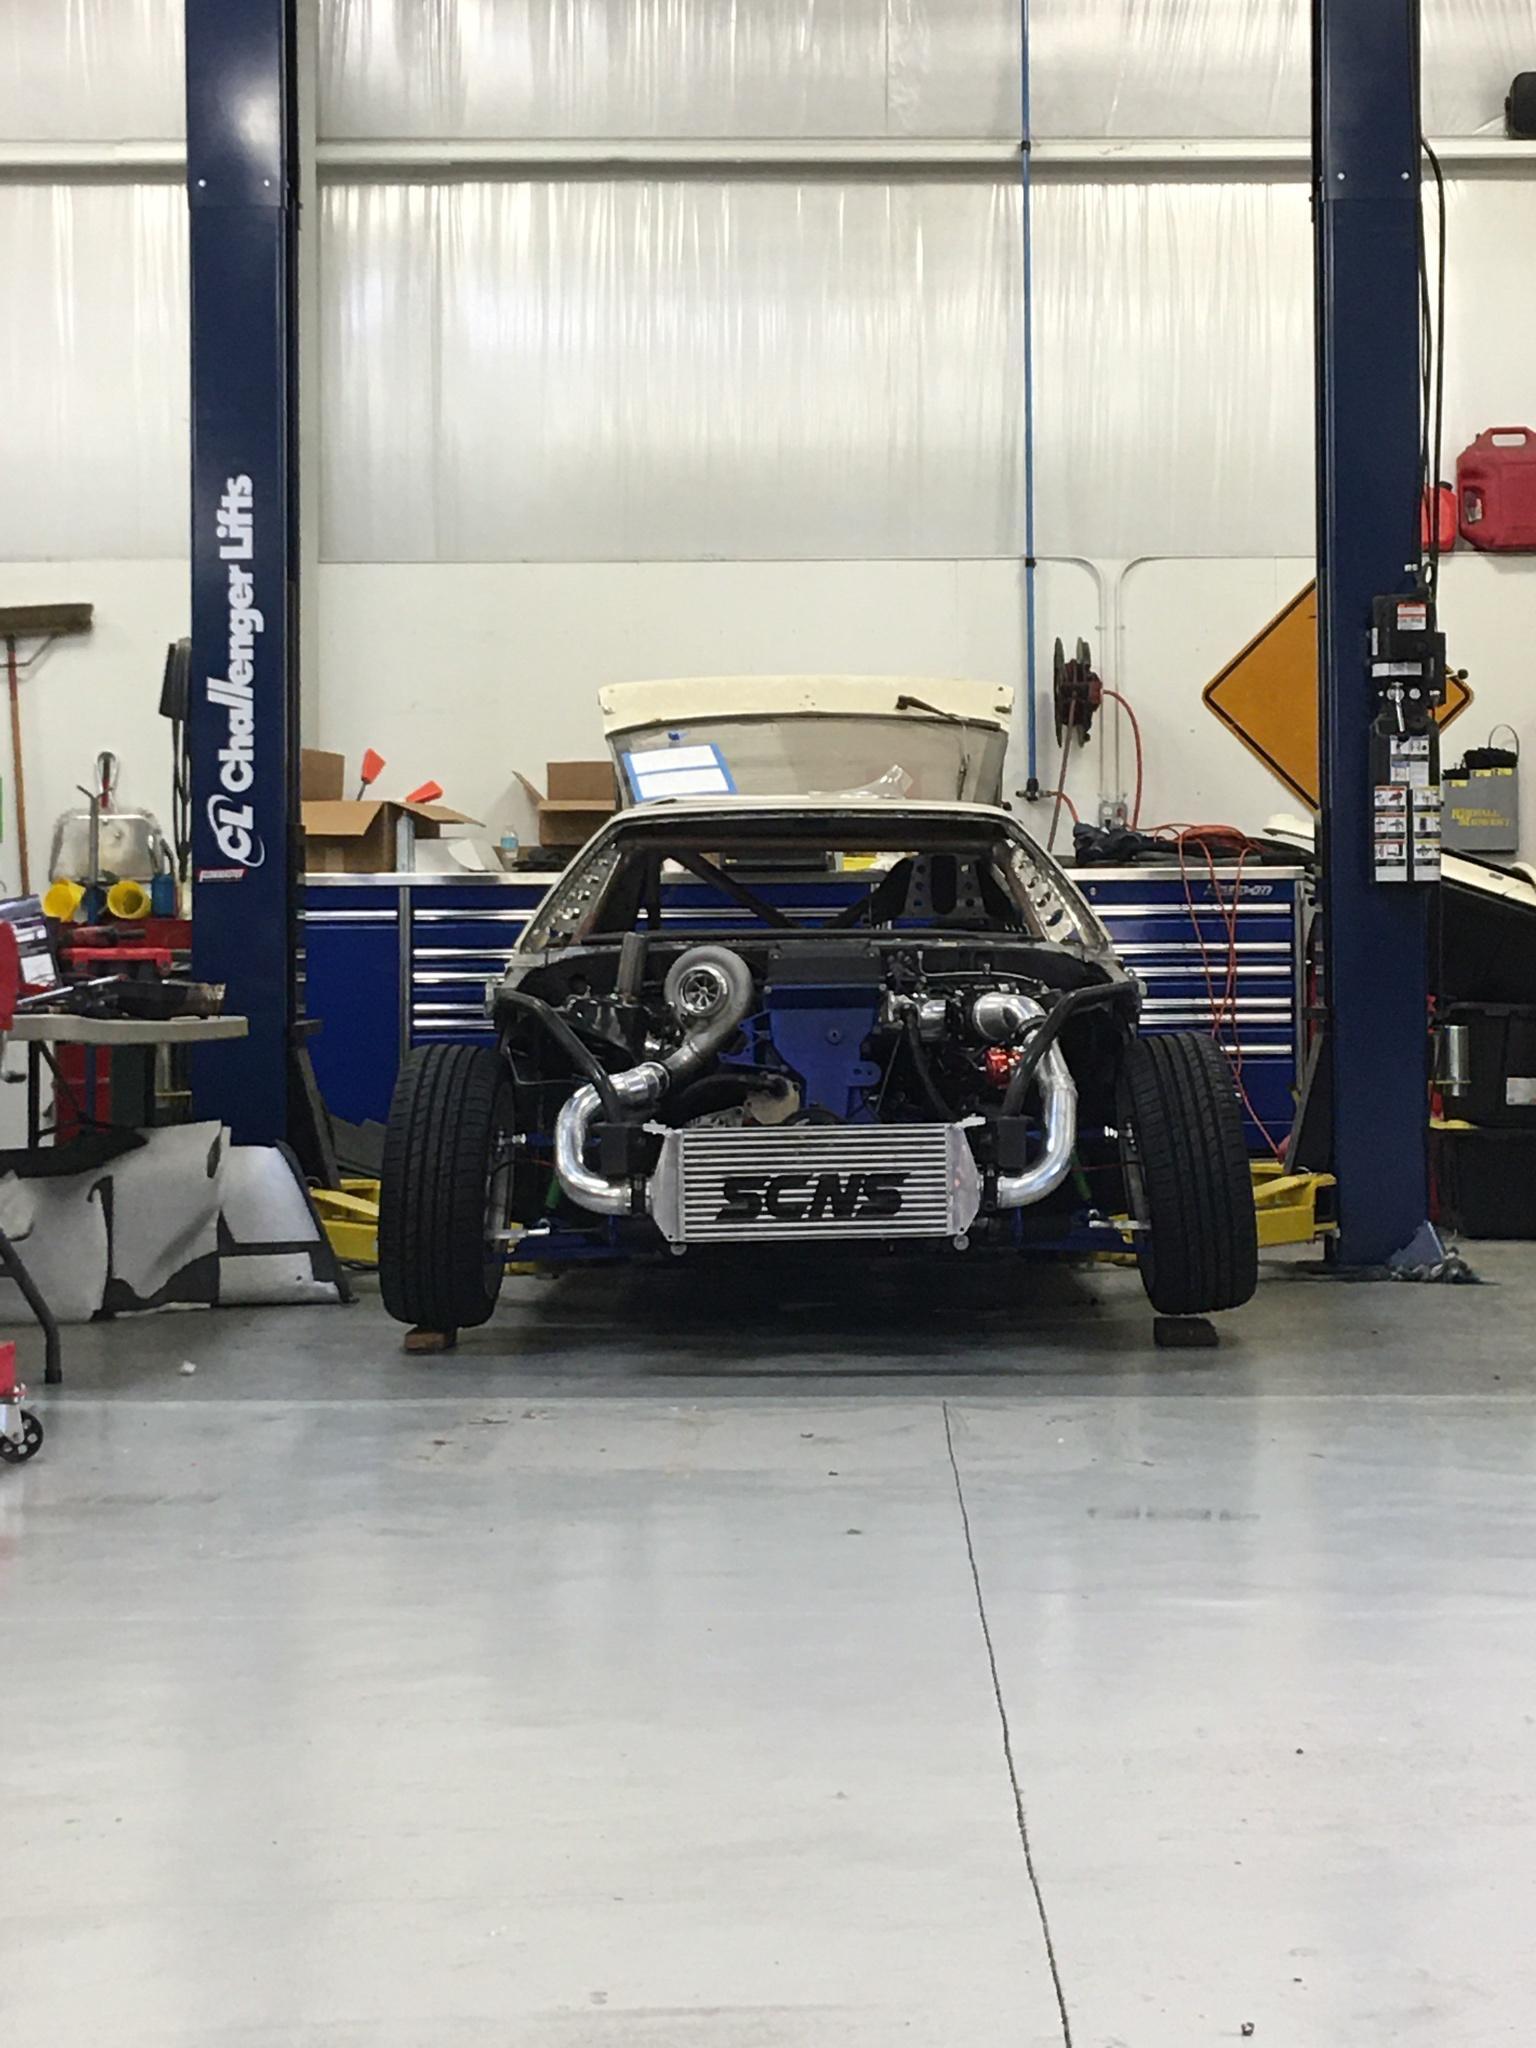
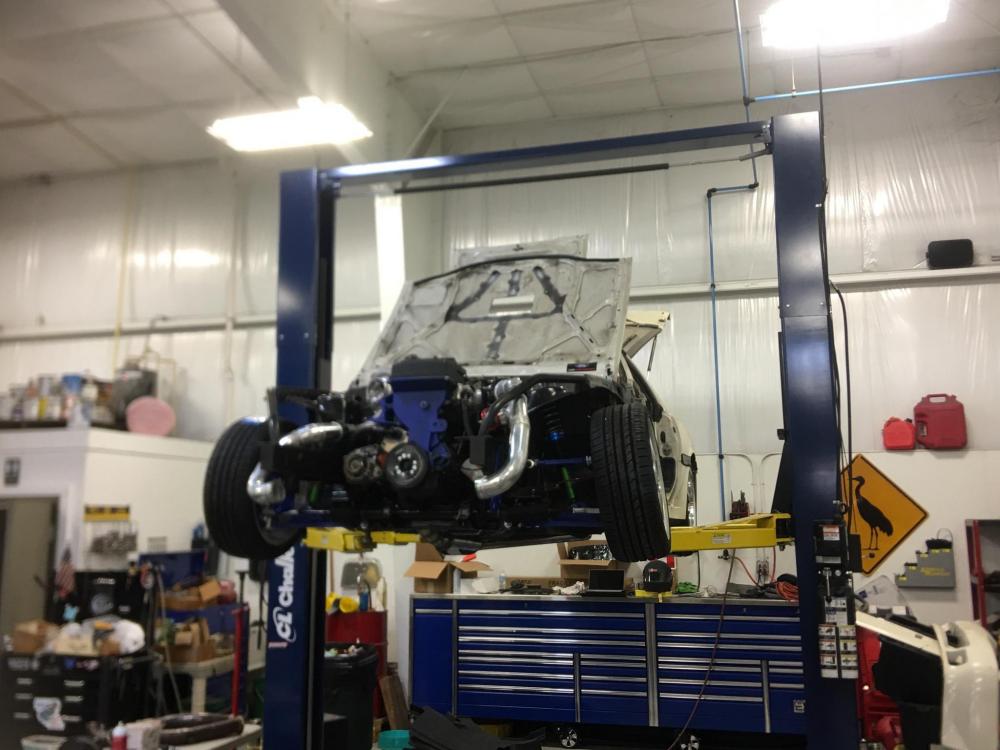
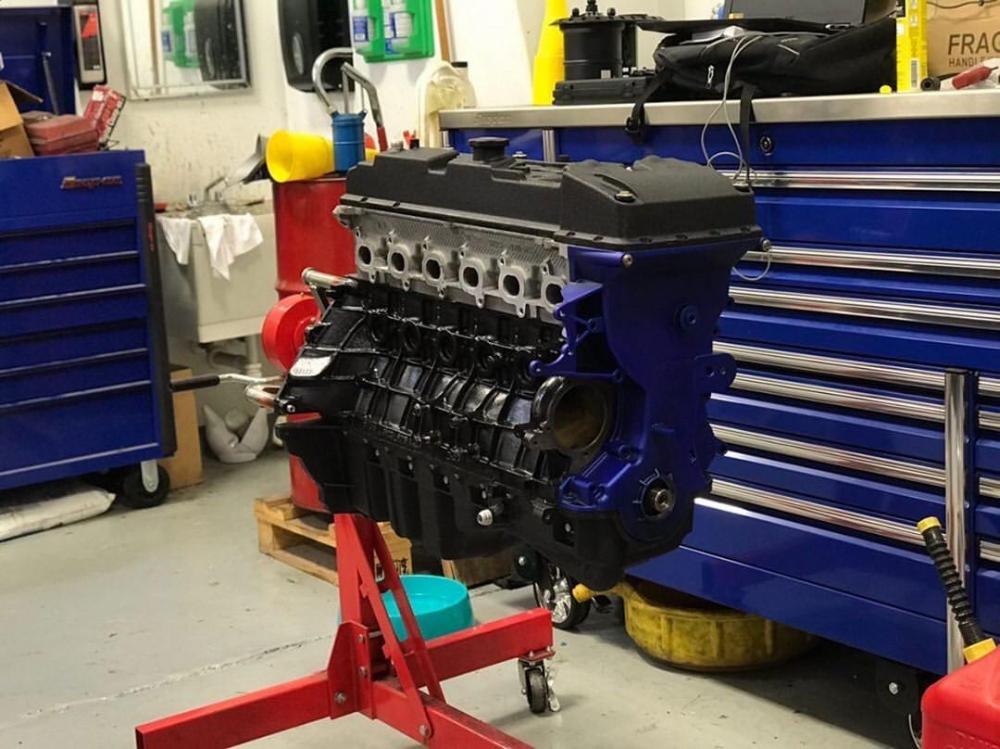
Ok, another update to the project that never stops. Big things have happened since the last update. Engine build was completed in June, and engine started in July. Once it was running I have finished most of the remaining fab work since then and now that wiring is complete the cage and going for paint soon.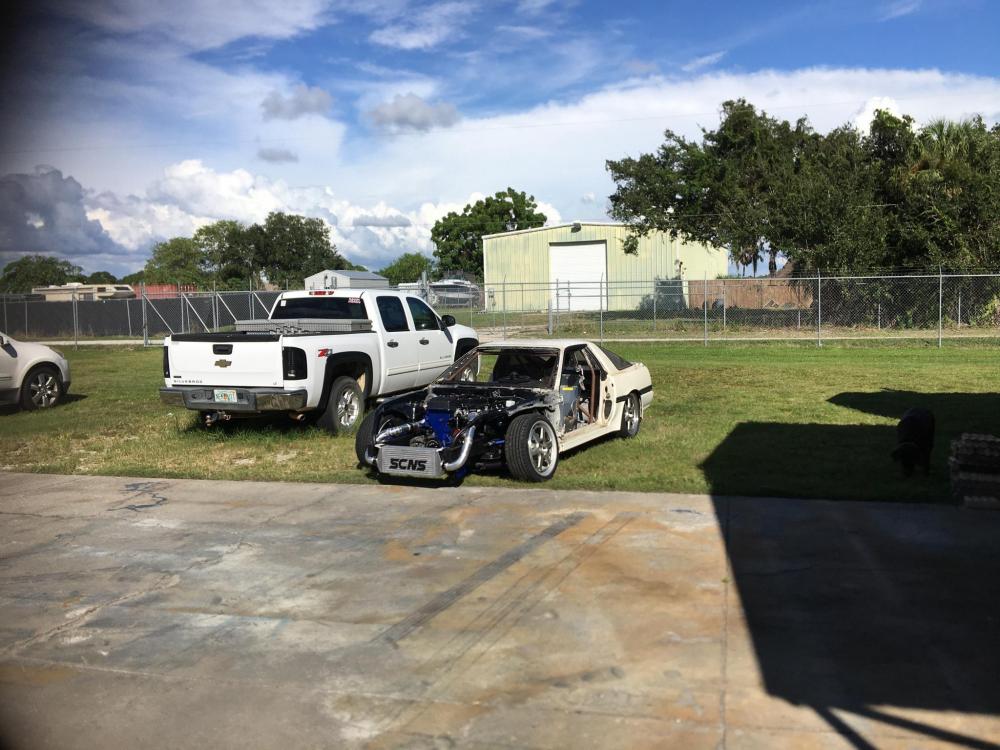


-
Barra build in the U.S.
SelectivePC replied to SelectivePC's topic in Conversions, transplants and Frankensteins
These were supplied with the transmission adapter kit, 10.9 on the bolt head so just a metric grade 8. Planning on using ARP stuff now that they are out, which ill be getting too in the next post, to answer your balancer question. So it happened, I talked to the engine builder and it is currently at this shop torn apart. He is extremely excited about this build too say the least. Took me 25 mins took disconnect everything with my buddies help, and load it into the truck. So time too prep for some paint in the bay, and powder coat the suspension stuff, while I wait. Wish me luck. -
Barra build in the U.S.
SelectivePC replied to SelectivePC's topic in Conversions, transplants and Frankensteins
So with this being the case, I have found a builder who is extremely excited about getting my Barra too start building the bottom end. Rods, and pistons. Your a tough sell @eff xr6t -
Barra build in the U.S.
SelectivePC replied to SelectivePC's topic in Conversions, transplants and Frankensteins
Oh yeah, it was going to be Turbo from the start. I'm wanting too see how far I can push it on stock rods. Once its running it will be getting a built bottom end. Then the real fun will begin. -
Barra build in the U.S.
SelectivePC replied to SelectivePC's topic in Conversions, transplants and Frankensteins
Yes once all the wiring is finalized ill be fitting the firewall with a appropriate mouser connector. -
Barra build in the U.S.
SelectivePC replied to SelectivePC's topic in Conversions, transplants and Frankensteins
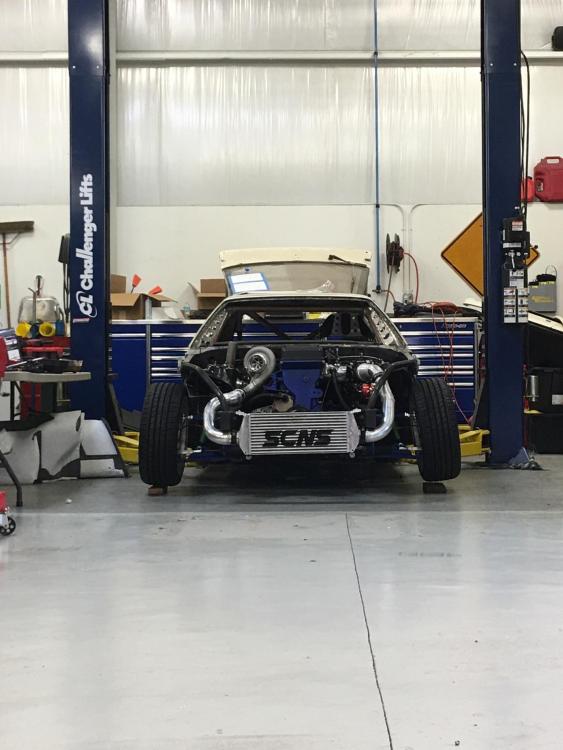
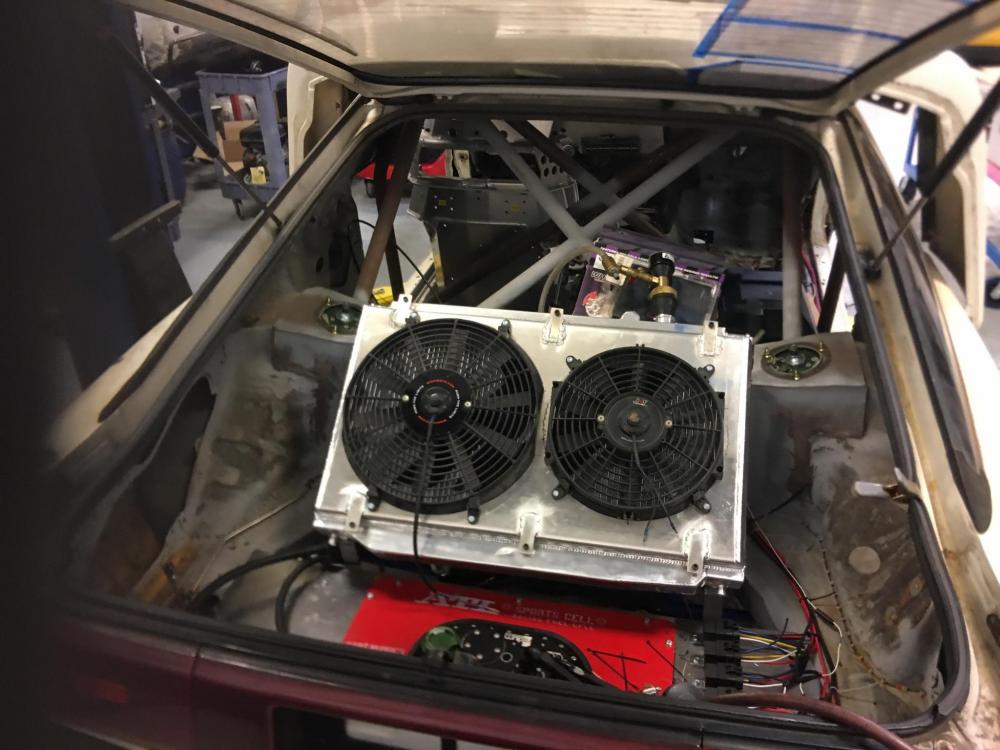
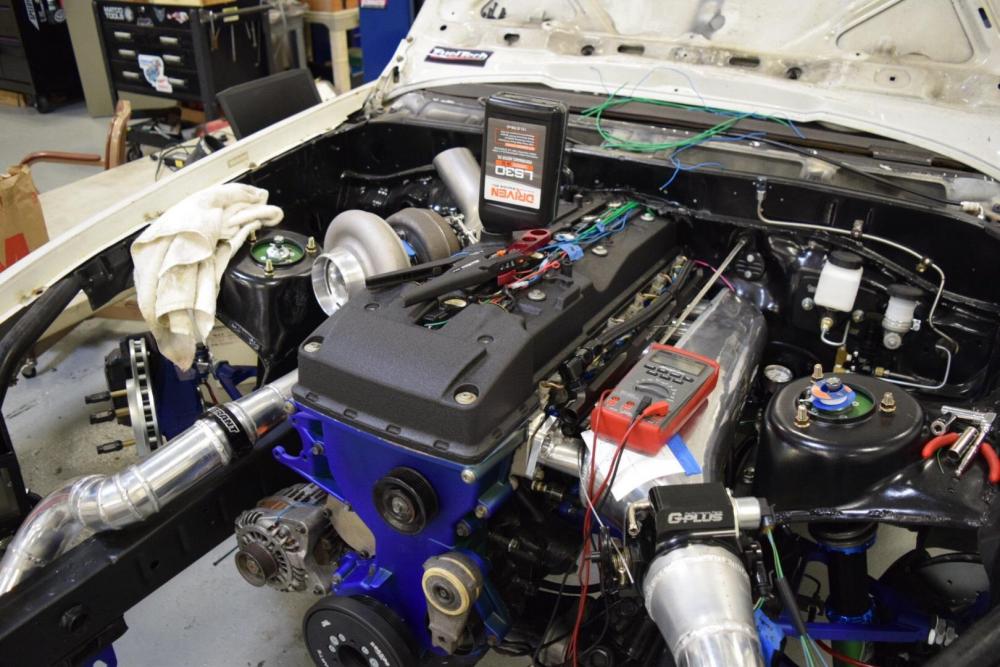
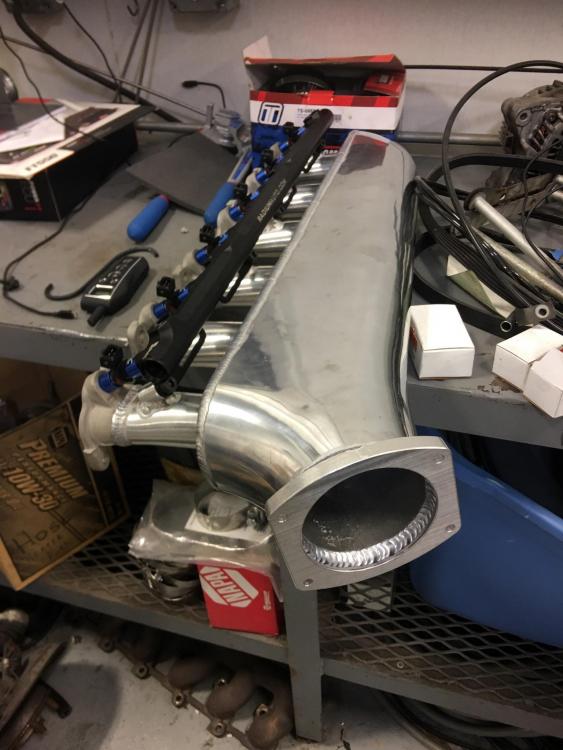
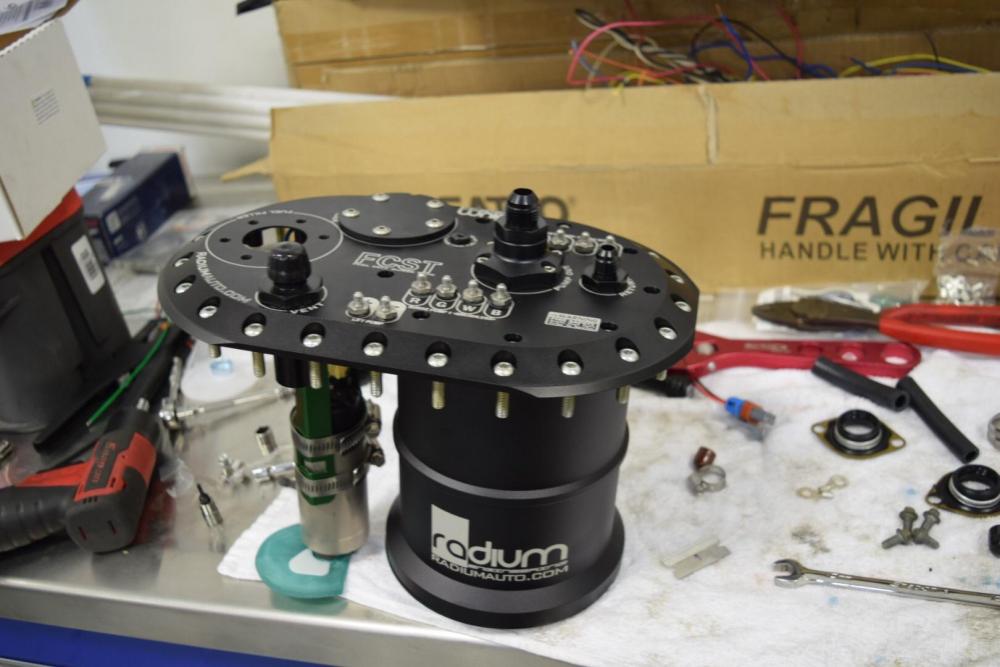
MAJOR UPDATE: So, lots of little work as been going on, not much to post about by themselves, but as a whole its starting too look like a car again. Wanting to make maintenance a easy task, so keeping the motor set easily removable is the goal. Currently without wiring, and fluids this takes 15 mins. New manual brake portioning setup and pedal setup. Also seen there is the FuelTech550 mounted. Turbo setup mounted and mocked for plumbing. Side note* waiting on a new front facing plenum, so getting rid of the over the top setup shown here. Fuel Cell, and rear mount radiator mounted and ready for plumbing. Still need to mount the water pump, has a issue sourcing a pigtail and plug, but all is fine now. And Finally everyone's favorite. Wiring.... So yeah, that's about it for now. Until next time from across the pond!! -
Jaguar x300 Barra swap
SelectivePC replied to nsxguy7's topic in Conversions, transplants and Frankensteins
Checking in from Florida!! It would be cool too see adapted. But how would you tune the trans a separate controller? -
So after a little research and going through the 600 plug Catalog Ford offers. I have matched the plug and it works!!! thanks for the ideas guys!! This is the greased version of the connector, there is also a non-greased version. Part Number : WPT-1361
-
I could defiantly do that, but being the main water pump, I'd like to have to have it on a nice plug. I actually ordered the kit with pigtails pictured above, last night.
-
I messaged both of the sellers I found online, neither of them are coming off the information. I think I may have ordered the wrong kit. Haha I may order the pump and wiring kit as pictured above, and return the pump only I ordered. Keep it simple
-
I ordered this pump through a different company, the picture I posted, was found when trying to research the plug itself.
-
Hello, kind of in a pickle with trying to ID a part number for a connector for a cobra jet water pump. Its used to pump the supercharger coolant. I am using it as a engine water pump. But when I ordered the pump it didnt not come with a pigtail. Has anyone here used one of these? Or possible know a part number for the pigtail. Attached are pictures of the 4 pin pigtail.


-
Yeah, checking in from Florida here, I have done basically everything you listed, plus a mild port. But yeah SXES366, valve springs, OPG's and good fuel on a NA-T set-up. I'm hoping for 500 from my setup, But I have a forged bottom end ready and waiting, so I may just push it.... 😮
-
Barra build in the U.S.
SelectivePC replied to SelectivePC's topic in Conversions, transplants and Frankensteins
Thank you sir, I over looked that lol. -
Barra build in the U.S.
SelectivePC replied to SelectivePC's topic in Conversions, transplants and Frankensteins
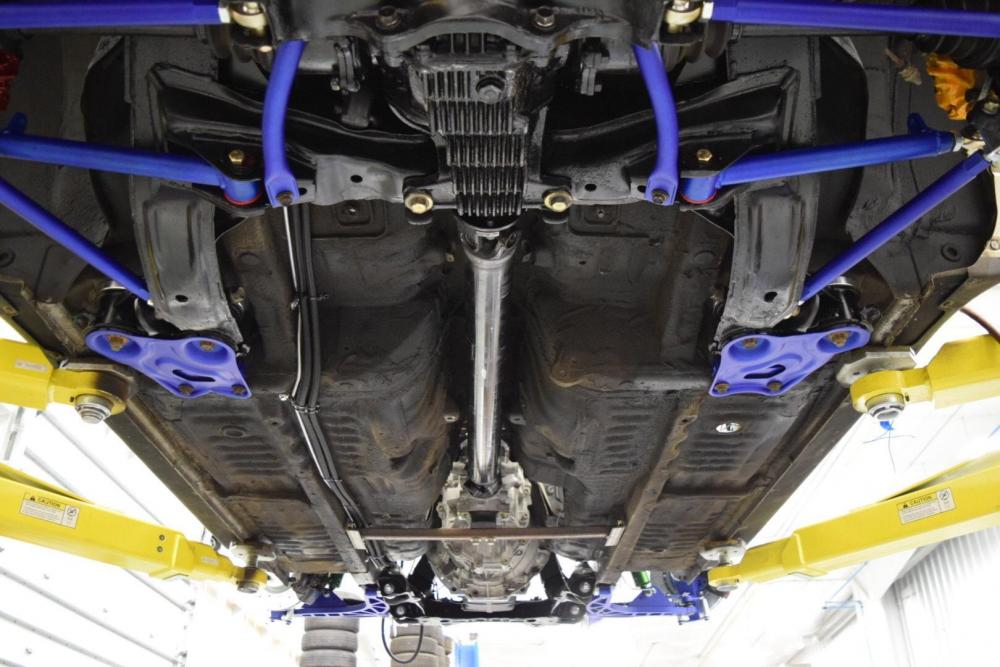
Kits together and installed... and was able to retain the factory sub frame, I will how ever need to figure something out to relocate the steering rack. On top of that little issue, a good bit of metal needed to be relocated to fit the larger CD009 tail housing side. -
Oh yeah, no need to go crazy with it.
-
Yes, buy yourself a plastic razor blade, it'll be your new best friend while prepping those surfaces.
-
Test fitted this!!!
-
So this is exactly like the Coyote's I work on daily, compared to my Barra I've worked on once in the last month. Clean and removed all old silicon from the factory seals (oil pan and timing cover gaskets) reuse and add new silicon to the area's where 1.The oil pan, block, and bottom of timing cover meet. 2.The head meets the block, and timing cover. 3.The valve cover meets the head, and front timing cover.
-
Barra build in the U.S.
SelectivePC replied to SelectivePC's topic in Conversions, transplants and Frankensteins
Hopefully, if its able to handle what ill be doing too it, should be a great kit. -
Barra build in the U.S.
SelectivePC replied to SelectivePC's topic in Conversions, transplants and Frankensteins
Update, build isn't dead yet. So the trans adapter to the Nissan CD009 has been completed, trying to test fit this weekend and make sure everything works nicely together.. more updates to come soon! -
Barra build in the U.S.
SelectivePC replied to SelectivePC's topic in Conversions, transplants and Frankensteins
So in some other good news, test fit the new Flywheel and starter setup to make sure everything plays nicely. Now we can finish making the adapter plate and clutch set-up. Side note, yes we know the starter did not disengage, the Bendex itself will be spun off the ring gear once the engine is started. -
Ford ranger heart transplant
SelectivePC replied to Doug666's topic in Conversions, transplants and Frankensteins
That is actually pretty cool. We never got that model of Ranger here in the US. But still pretty cool to see. -
Barra build in the U.S.
SelectivePC replied to SelectivePC's topic in Conversions, transplants and Frankensteins
So the JZA70 chassis has after market sub frame spacers available. So it will drop an inch there, as far as the rest, after looking at he hood for clearance, maybe an inch will be gained from removing the under mat from the hood. as well as some bracing in the framing of the hood. Worst case the vehicle will be a track whore that will be drifted as much as possible. So if a hole needs to be cut in the hood so be it!!