Leaderboard

-RABS4K.thumb.jpg.eb7f5cabb2776d08d3d8f0475f8ef966.jpg)
Popular Content
Showing content with the highest reputation on 07/08/18 in all areas
-
8500rpm here I come5 points
-
Haha I've shifted $2k of parts out the door in just over a week and still have motor, turbo, box in the car! Turns out straight B-series don't come up too often in Canberra for wrecking. The best actual cash in hand ready to go offer I got on the whole car was $3200. Learning heaps along the way too. Engine and box will come out Saturday so more fun to come.3 points
-
Next installment, caster camber kits; As mentioned above I installed Kmac caster camber kits, I like the design with no shimming required and a much larger range of adjustment however I didn't like the execution. The welding was not something I would trust at speed while throwing the car into corners or under heavy braking. Just imagine the torque applied to the upper control arms when braking a 1800kg car from 100+ km/h. I installed them for about 2 weeks with the thought that they (the manufacturer) must know what they are doing and it would be OK. While driving around my conscience got the better of me, the idea of them snapping off at speed gnawed at me, so I pulled it all apart again, ground all the welds off and re-welded every connection point with twice as much weld length while achieving decent penetration as compared to the original welds which as far as I could see, seemed to be just sitting on the surface. These have been in the car for probably 7 years and 100,000km now, no issues, never slip out of adjustment, excellent. An additional tidbit for anyone interested, I did all of my wheel alignment work at home with string lines for toe and a digital level for camber. I never worried about what the caster angles were as an actual number. Yes, caster is important, definitely so this is how I approach it; dial in as much caster as I can on the LH front wheel, this means take it to the limit of adjustment (shim or adjust the upper control arm so the top ball joint is as far toward the rear of the car as possible) Dial in slightly less on the RH front wheel, if I had the actual numbers it would be something line 1 degree less caster on the RH front (upper ball joint slightly further toward the front of the car) On the FG's I think the caster angles end up being somewhere around 5 to 6 degrees, happy to be corrected here but this wont be too far off. I did experiment with offset drillings in the upper control arm mounts to dial in even more caster but found the car seemed to not like it too much so reverted back to closer to standard values. Note- Caster is the best wheel alignment angle to use to get the car to drive straight (resist the camber of the road), you can do it with camber but this will cause unwanted wear on the inner edges of the tyres (excessive negative camber, in particular on the LH front) 3. Set camber on both front wheels to just over -1 degree on each side (actual ended up being around -1.2- 1.3 degrees), there can sometimes be a bit of fiddling around as each change to camber affects caster and vice versa. You just need to work with it until you land in a spot you are happy with. 4. Set string lines down each side of the car and set toe on the front and rear, I put a slight amount of toe in on the front, say around 1mm on each side. Similar deal on the rear of the car but the factory set up doesn't allow much freedom in alignment sadly. There is one adjustment that changes both camber and toe at the same time so a compromise has to be struck between the two. I generally ended up with around 0.7 degrees negative camber and toe close to 0. It is never perfect due to the constraint I mentioned before. There are aftermarket kits available to sort this out but I never felt the need to bother. No such thing as caster on the rear. Final step is to road test the car, promptly find out it pulls left or something just as irritating and go back and do all of the above again, repeat numerous times and after something like 6 months of dicking around arrive at a point where I am happy with it. Images of caster camber kits below with before and after welds, you guys should be able to see which are which...2 points
-
Ok maybe I have a juvenile sense of humour but this literally made my ribs hurt from pissing myself @Rab & @Puffwagon in particular it may appeal to speed cooking2 points
-
Stripes, I think this is you..1 point
-
@El Andrew send me a link and take my money already dammit1 point
-
Easy fit!1 point
-
^^ this May as well make it an F61 point
-
Are they much better than the 41lb version? That's what I want to know1 point
-
Rollerblades1 point
-
And that's why I let the women do the cleanup after I cook1 point
-
aww shieettttt1 point
-
Morning all! Starting my last 8-day swing on site. Can definitely see the light at the end of the tunnel now!1 point
-
That's my daily as well1 point
-
EFR 9180 installation; This was a bit of a mission. The worst part was the power steering high pressure hose and reservoir relocation. To keep it as stealthy as possible I decided to low mount the turbo on the stock exhaust manifold, this part of the fitment was very straight forward from there on it was fiddly. High Pressure P/S hose was a pain, it is as if Ford specifically didn't want anyone to put an EFR on there, especially with the location of the P/S switch. I ended up bending up a piece of fencing wire to reflect the final shape I needed the first 10'' of the line to be and took it, along with the hose, to Pirtek. They cut and shut the hose in the correct orientation. This worked out OK and for around $30 I got out of it OK. P/S reservoir relocation, pretty straight forward, but I did impose a caveat on myself, like with most other modifications I wanted to be able to return to stock at a later date if needed. So with this in mind I made a bracket to mount the new remote reservoir back near the brake booster, this picked up an existing (stock) hole to anchor the bracket. The reservoir is nicely hidden and looks stock in black. To connect to the P/S pump I machined up a brass hose tail that slipped in to the power steering pump and sealed using the same "O" ring that the standard reservoir uses, to retain it I drilled a small hole through the P/S pump that allowed me to put a split pin through the pump and pick up the edge of the hose tail. Wish I took a picture of this because it is hard to explain. Either way, it worked out fine and left me with the ability to remove everything and return it to stock later. I used a banjo fittings that went to a 1/2'' hose tail to connect to one of the factory water lines with flexible hose. The second water line just bolted straight on to the EFR with a slight amount of bending required. The oil feed line bolted straight up (I already had the flexible braided Earls feed line from past issues...). I finished off the oil drain line with a couple of hose tails and a flexible hose from Pirtek, it was too close for comfort to run a flex hose that close to the turbine housing so I heat wrapped it and secured with stainless cable ties (same stuff you wrap extractors with). Usual stuff for drivers side air box modification, Plazmaman battery relocation kit to get rid of the battery. I didn't want to pay for an airbox so I fabricated once from stainless myself, nothing special it just needed to cover the K&N pod filter. Got a mate to bead blast it to a matte finish which I don't mind. I was going to paint it black but the sand blast look grew on me. The EFR's are a vee band exhaust connection (around 3" I think), so out with my old dump pipe that suited the GT3582 and a bit of cut and shut on that with mandrel bends from the local exhaust shop. It is bloody tight trying to squeeze a 4'' pipe between the turbine outlet and the firewall/steering shaft. It worked out OK after a few trial fits, just tack welded it in place then removed it from the car for final welding. I add an extra bracket to support the dump pipe that bolts to the engine block while I was at it. I was not keen on hanging the whole front section of the exhaust off of the turbine housing alone (which is how the old exhaust was done by others). Hot side turbo piping was pretty straight forward, given that I already had a Nizpro intercooler installed it all lined up pretty well, just a couple of silicone elbows and it was away. Then it was tuning time, to be honest I didn't need to do a whole lot, I have a wide band permanently installed in my dump pipe so I logged AFR's on some WOT runs, looked OK at around 11:1, listened for any pinging and then started throwing some more boost at it. Again, it is few years back when I did this so I think I pulled a couple of degrees of timing at full load. Apologies for the pictures, they are all I could find on my old hard drive, normally I would be able to take some more but I am not at home ATM. EFR 9180 vs my old GT3576 Trial fitting of the EFR Halfway through the fitment process, the remote P/S reservoir is not installed in this image, it ends up hiding to the left of the brake master cylinder.1 point
-
Got a few new upgrades..1 point
-
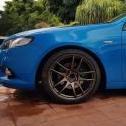
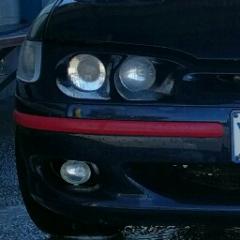
OK, I think I have worked out the picture side of things so here we go. Images of the car, as explained about as boring as it can be, just looks like a stock hire car which was the intent. It is about an inch higher now since I put Tein coilovers in it. On close inspection a couple of the shots are from a long while back so have factory ride height. At least one of the shots has a clue to its location in the background. Will post some pics of the EFR as a second installment.1 point
-
@gazman get Jeturbo to do it mate and source you parts as well for the best price and service1 point


This leaderboard is set to Sydney/GMT+10:00